Theme Layout

Boxed or Wide or Framed

[Boxed]

Theme Translation

Display Featured Slider

No

Featured Slider Styles

[Fullwidth]

Display Grid Slider

No

Grid Slider Styles

Display Trending Posts

No

Display Author Bio

No

Display Instagram Footer

Powered by Blogger.

Search This Blog

Blog Archive

Showing posts with label Beginner Sock Knitting. Show all posts
Our First Pair Of Socks - Part 5

Our First Pair Of Socks - Part 5


For today's post I'm talking about finishing the toes. You decrease the same way as the gusset decreasing and the only difference is that you decrease in more spots.

Needle 1: Knit to last 3 stitches, then knit 2 together, knit 1.
Needle 2: Knit 1, ssk, then knit all those stitches on that needle.
Needle 3: Knit to last 3 stitches, then knit 2 together, knit 1.
Needle 4: Knit 1, ssk, then knit to end.

That is your decrease round. The next row is just knit, these 2 rows are your rows for decreasing the toes. Then you basically just keep decreasing like this until you have 6 stitches on each needle, a total of 24 stitches. You then need to move some of your stitches so that they are on 2 needles. You want it to be flat so that you have a heel side and an instep side. The last step is to use kitchener stitch to graft the toes together and once that is done you have finished your first sock.

See how I've moved my stitches and it's sitting flat. What you are seeing is the sole and heel side of my sock


 Now I just want to talk about two things. Kitchener stitch and the toes on this pair of socks. Now with kitchener stitch I myself really struggle to do this stitch and I can't actually do it the normal way. I always used to get to the last toe stitches and then knit a few rows in waste yarn and then graft from there. Now I have found a YouTube video that knits the stitches off and I can finally do it but I always do it this way. You are left with a bit of a loop at the end but I always pull this through to the inside and I sometimes use the needle to help it through.

Now about the toes on this pair of socks. All my past socks have always been knitted down to 3 stitches on all needles, so you end up with a more pointed toe. Now with this pair you go down to 6 stitches, so it's more of a rounded toe. Since using this pattern I have now decided to make all my future socks with the same type of toe as I like the look of it more.

See how the purple toe is a lot wide

See how the orange toe is pointy and the purple one is more rounded

So that is your first sock done and now you can start casting on for your second sock. Once you have made the second sock you will need to wash and block your socks. We will talk about that when the time comes.

Hope this is helpful. Need help? Contact me.

Happy Knitting
Sharyn

Read more »
Sharyn Mathieson
0 Comments
Weekend Knitting

Weekend Knitting


For today's post I thought I would show you want I'm up to in my knitting over the weekend. It's not my favourite task and the only good thing about it is that I will have a finished pair of socks. I sometimes drag my toes when it comes to the finishing touches of sock knitting and with my current wip I struggled a bit with the whole knitting of this pair of socks. Finally though I can see the end of these and I hope my next pair will come off my needles a lot quicker.

Weekend knitting
So this weekend is going to see me grafting toes of my beginner socks and then sewing in the ends. I'm also hoping to get a post up tomorrow about the toes of our beginner socks as they are slightly different to what I normally knit. I'm interested to see how they fit and look and I may end up knitting them this way from now on. It's going to depend on how they look on the foot. Anyway I will explain more tomorrow once I have done the toes and can get a model.

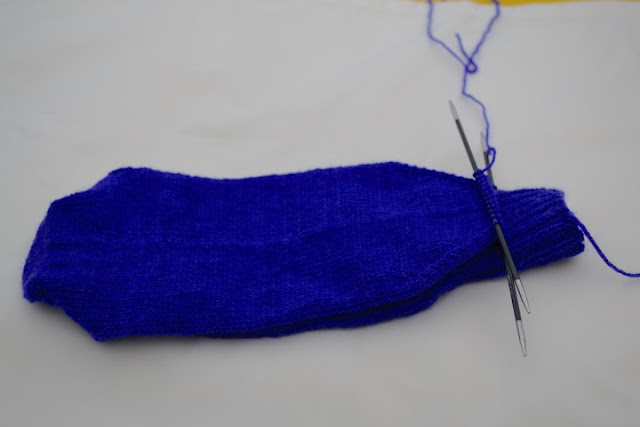
Beginner sock ready for grafting

So that's my sock knitting for the weekend. What are you up to? Need help? Contact me.

Happy Knitting
Sharyn

Update: Ends are sewn in and toes grafted so I've finally finished and they are almost ready for wearing, just need to wash!

Finished
Just need washing

Read more »
Sharyn Mathieson
0 Comments
Our First Pair Of Socks - Part 4

Our First Pair Of Socks - Part 4


Sorry for being away from our socks but the weather hasn't been in my favour this past week and I like to be able to take photos so you can see what I'm doing. Also I've been trying to finish off hubs socks as well.

So for today's post we will be talking about setting up for the gusset and what happens next. So once we have finished knitting the HEEL TURN we will start picking up stitches along the heel flap. So it says to pick up 16 stitches along the heel flap, I pick up and knit into the back of these stitches. Next you knit the stitches from the next two needles, these stitches are the instep. Then you pick up and knit into the back of the stitches from the other heel edge. You then knit the 9 stitches from turning the heel. So when you finish you should have 82 stitches on your needles. So this is how it should look on needle 1 it will have 25 stitches, on needles 2 and 3 - 16 stitches and on needle 4 - 25 stitches. Once you have the stitches set up you then knit one round and that's the set up for the gusset. The beginning of the round starts in the middle of the heel.
Needle set up for gusset
Rounds start in the middle of the heel 

The next step is to start decreasing stitches so that you get back to the original 64 stitches. It's just a two row repeat and knitting on needle 1 we knit until we come to the last 3 stitches, knit 2 together then knit 1. You then knit across the next 2 needles which are the instep stitches. Then with needle 4 you knit 1 and then ssk and then knit to the end, this is your decrease round. SSK means slip, slip onto the righthand needle (slip your stitches knitwise one at a time) and then take your lefthand needle and put it through these stitches and knit.
Working on needle 1


In our next post we will be looking at how to measure our foot length and then it's a matter of knitting until we get to the toe decreasing.  It's all down hill from now on and it will come together very quick and you will have 1 sock finished and be ready to start knitting it's mate.


Hope this is helpful. Need help? Contact me.

Happy Knitting
Sharyn
Read more »
Sharyn Mathieson
2 Comments
Our First Pair Of Socks - Part 3

Our First Pair Of Socks - Part 3


So for today's post I'm going to continue onto the next step in knitting our socks. We have completed the heel flap, which is worked on just two needles. And once that is finished it's time to turn the heel.
Heel flap
When you finish turning the heel you should end up with 18 stitches and the last row requires you to knit across these stitches. This is so we will be ready to setup our gusset which is the next step.
Heel turned
So this is just a short post today to hopefully show you what your sock should look like. I will be posting in the next couple of days showing you how to setup for the gusset.

I've also decided that when I make its mate I will be doing video's and posting them on Youtube. I'm doing this as I think some people find it easier to look at a video rather than reading and photos. I know I find it easier!

Hope this is helpful. Need help? Contact me.

Happy Knitting
Sharyn
Read more »
Sharyn Mathieson
0 Comments
Weekend Knitting

Weekend Knitting


So for today's post I thought I would post about my weekend knitting. I actually have two projects in my bag and that's unusual for me. I always just concentrate on one pair of socks at a time and then when I just have to sew in ends I will cast on for another pair.
Weekend Knitting
I don't have that far to go with the orange socks which were my current work in progress and I started the purple ones to guide beginner sock knitters with. The purple ones are going to be a bit slow as I'm posting each step for beginner knitters to follow along. With the orange socks I'm almost at the gusset and once I'm there I always think I'm on the homeward stretch.
Picking up stitches
I'm going to concentrate on these orange ones and hopefully get them done, if not by the end of the weekend then hopefully by Monday.

I had a nice comment by a lady when I posted about these socks before saying when she knits socks with bright colours she likes to knit stripes to break up the colour. This gave me some food for thought and if I hadn't been so far ahead with these I would have considered it. I had some navy and I like orange and navy together. My thinking was I would knit the legs in orange and then mix up the feet with missed matched stripes of varying width of stripes and different coloured heels. I got quite excited about it but then realised that I had already knitted it's mate:-(

This is the great thing about learning how to knit socks as you can make them any colours you like and if you really start to get into it, you will end up with lots of leftover yarn. And then if you are making them for family you can make stripy socks using up the leftovers.

So anyway lets see how I go this weekend, here's hoping I get them finished. Have a great weekend.

Enjoy your weekend knitting
Sharyn
Read more »
Sharyn Mathieson
0 Comments
Our First Pair Of Socks - Part 2

Our First Pair Of Socks - Part 2


So for today's post we are going to be moving along to the heel flap but first off you need to knit the leg to the desired length. I've knitted mine longer this time around, I haven't been knitting for a little while and I was enjoying it so much I got carried away. Of course I could pull it back a bit but I don't like doing that sort of thing.
I knitted my leg length to 7 1/2"

So now I'm about to knit my heel flap, so I just want to clarify that your first and second needle will be your heel stitches and your third and fourth needle will become your instep stitches. Now when you go to knit your heel flap it's best to move the stitches from your second needle onto your first needle so that you are knitting your heel flap on one needle.
Transferring my stitches to needle one
Heel stitches on 1 needle ready for knitting
If you are following this pattern and using five needles you will already have your other two needles set up. And then what I do is follow rows 3 and 4 for the whole heel flap and I do just 32 rows all up, that's 16 rows for each row.
Repeat rows 3 and 4, 16 times each

Now of course you don't have to follow what I said, this is just the way I like to do it.  You can follow the pattern instead. Next time we will be turning the heel and looking at the gusset and how to set it up. I hope you have a great weekend.


Hope this is helpful. Need help? Contact me.

Happy Knitting
Sharyn
Read more »
Sharyn Mathieson
2 Comments
Our First Pair Of Socks - Part 1

Our First Pair Of Socks - Part 1


So today I thought I would look at knitting our first pair of socks. To find a sock pattern you could Google to find a free pattern for beginners or you could also check out Ravelry. Ravelry is a free community of knitters and people who crochet. It's a great resource for patterns, free and paid for. The website also has groups that have forums you can join, where you will find people that enjoy the same things you do. I can easily spend hours browsing the pattern section looking for new patterns.

So this is the pattern I've picked to knit as the first pair for a beginner sock knitter. Now you don't need to join Ravelry and download this pattern if you choose to check out Google that's fine. This pattern is just a plain pattern where you rib for the cuff and then the rest of the knitting is plain knit, a very simple pattern. What I thought I would do is go through the steps and take photo's along the way, this way you can follow along and if you are using a different pattern it should not be too hard to work out what to do. I'm also more than happy to answer any questions or do a video if it helps to show you how to go about it.

This pattern would be a woman's medium sock pattern and you knit it using 5 dpn and the first thing we need to do is our gauge. Make sure to first wash and dry your swatch before measuring and counting. Then measure 2" and divide between 2 and that will give you your 1" gauge.

Now for the cast on, it says to use the long tail cast on but if you're new and not sure how to go about it just cast on using a basic cable cast on. It`s then just a simple task to slip your 16 stitches onto their needles. It`s then just a matter of slipping the first stitch you cast on to the last needle and then taking the last stitch and slipping it onto the first needle. The most IMPORTANT step here is to make sure you do not twist the stitches. The easiest way to check this is to make sure all the bumps are on the inside of your work.


When you start off it's probably going to be a bit awkward ribbing the first few rows, be patient as it gets easier with the more rows you do. Also I find it easier to have the needles I'm ribbing with on top and the other needles below out the way. Just remember it does get easier. Also each time you come to a new needle make sure to knit those first two stitches firmly so you don't end up with a ladder. 


The pattern then says to start your ribbing and you get to chose. My personal preference is 2x2 and it says to rib for 15 rows, I like to rib for about 2 1/2 to 3". So you can see by the photo above 15 rows measures just over 1", I will probably do another 1".

The next step is to do plain knitting until you have the desired length you want, I normally knit crew socks. To work out the approx. desired length you can slip the sock on, which I have done many times but with all the needles it sometimes is a bit hard. Another way is to stand up against the wall standing up straight and taking the measurement from the top of the back of your heel. I find 6 1/2 to7" is usually about right for me, I've got little legs.

So I'm going to make my next post about doing the heel and looking at the gusset. I hope your having a great weekend.


Hope this is helpful. Need help? Contact me.

Happy Knitting
Sharyn

Read more »
Sharyn Mathieson
4 Comments
[name=Sharyn]

Follow @georgialoustudios